Measuring coatings the simple way
18th Apr 2023 | In News | By Mike Richardson
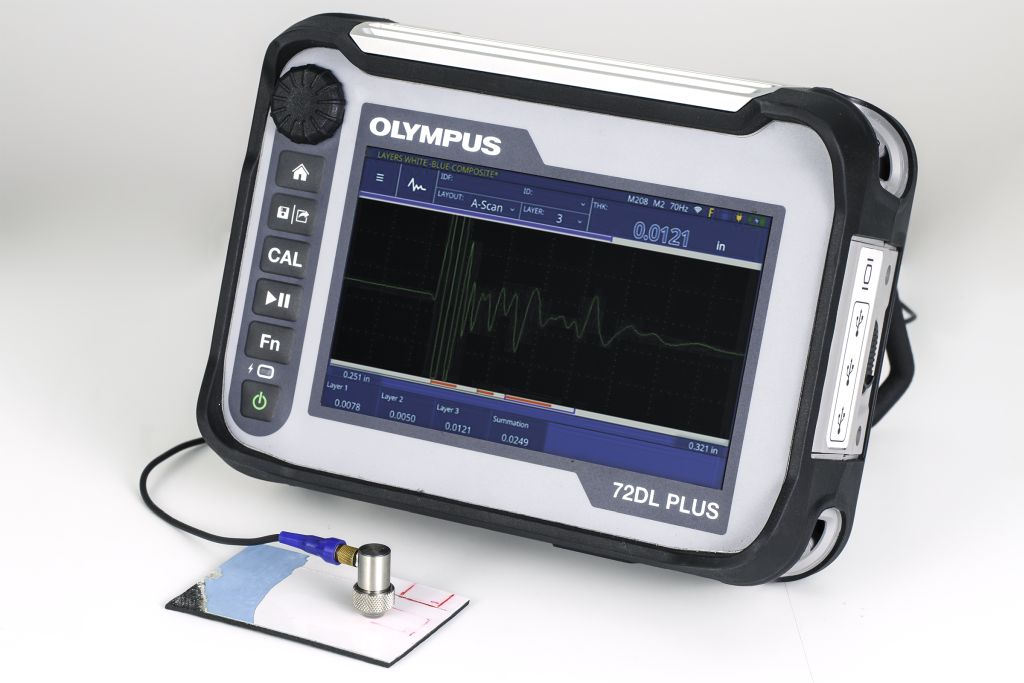
Inspection and measurement solution specialists, Evident outlines the importance of coatings on aircraft composites and how to measure their thickness in a much simpler way.
To keep today’s aircraft as lightweight as possible, the thickness of the paint and coatings applied to aircraft composites are strictly controlled. Aesthetically, coatings are used to decorate the aircraft and show an airline’s branding. Functionally, they provide protection to the composite from fluid damage. Long-term contact with water can affect some resins. Furthermore, freezing and thawing from changes in atmospheric conditions can cause damage to the composite structures.
Coatings can also protect composites from other damage caused by fluids, such as fuel, hydraulic fluid, and de-icer. As coatings serve these important functions, they must meet strict quality control standards. The coatings must be lightweight, flexible, resistant to fluids and corrosion, and offer long-term durability for a long service life.
Controlling the coating thickness helps manufacturers manage aircraft weight. It can also protect the aircraft from lightning. A coating that is too thick can affect the efficiency of the lighting strike protection of the aircraft. Aircraft composites often have a metal foil mesh on areas on an aircraft that are susceptible to lighting strikes. The metal mesh enables the composite material to dissipate a lightning strike over the surface of the aircraft in the same way it would in an aluminium body aircraft.
As a result, controlling the thickness of paint and coatings is critical to safeguard the surface of the aircraft composite - whether an aircraft is being produced or repaired and repainted. In this application, the most important factor for quality control is the total thickness of the paint or coating. In many situations, it is important to confirm the individual thickness of each layer to help control the consistency of each layer as it is being applied.
The coating on a composite aircraft typically contains four or more layers. This includes an anti-static coating, surface layer, primer, and more than one topcoat. These layers are very thin: the total thickness of the coatings on composite aircraft is typically under about 0.020 in. (0.50mm), while the individual layers can be as thin as 0.002 in. (0.050mm).
Controlling consistency
To control the consistency of these coating layers, it is important to use a thickness gauge that can measure ultra-thin and multilayer materials. An efficient solution for aircraft manufacturers is an advanced ultrasonic thickness gauge that can measure the total thickness of a coating and its individual layers with one test.
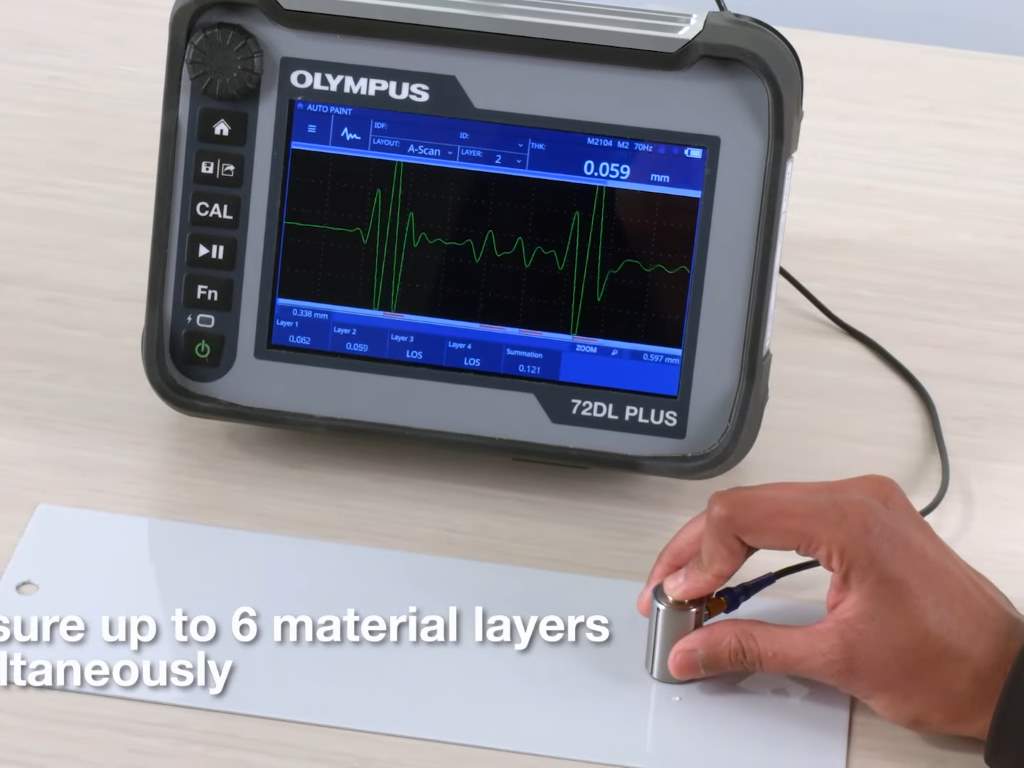
One example is the 72DL PLUS ultrasonic thickness gauge from Evident. This portable instrument delivers reliable, lab-quality measurements at high speed. Using single-element transducers, the gauge can drive frequencies up to 125MHz. Its high-frequency capabilities enable technicians to make measurements well below the minimum thickness capability of traditional ultrasonic thickness gauges—as low as 0.001 inches (0.025mm) or thinner.
Notably, the gauge can measure and display the thickness of up to six layers at once, making it an efficient solution for multilayer paint and coatings. As processes can vary, manufacturers should consider their specific application to determine if total thickness or individual layer thickness is achievable.
Promoting the coating
The following example shows a typical application to measure the total thickness and individual layer thickness in multilayer coatings on composite aircraft. In figure 1, the sample has a surface layer and two topcoats.
The total thickness measurement of the coating uses a transducer in the 20–50MHz range. The thickness gauge is adjusted to suppress echoes from the internal layers. The gauge takes a total thickness measurement from the front surface to the top of the composite structure.
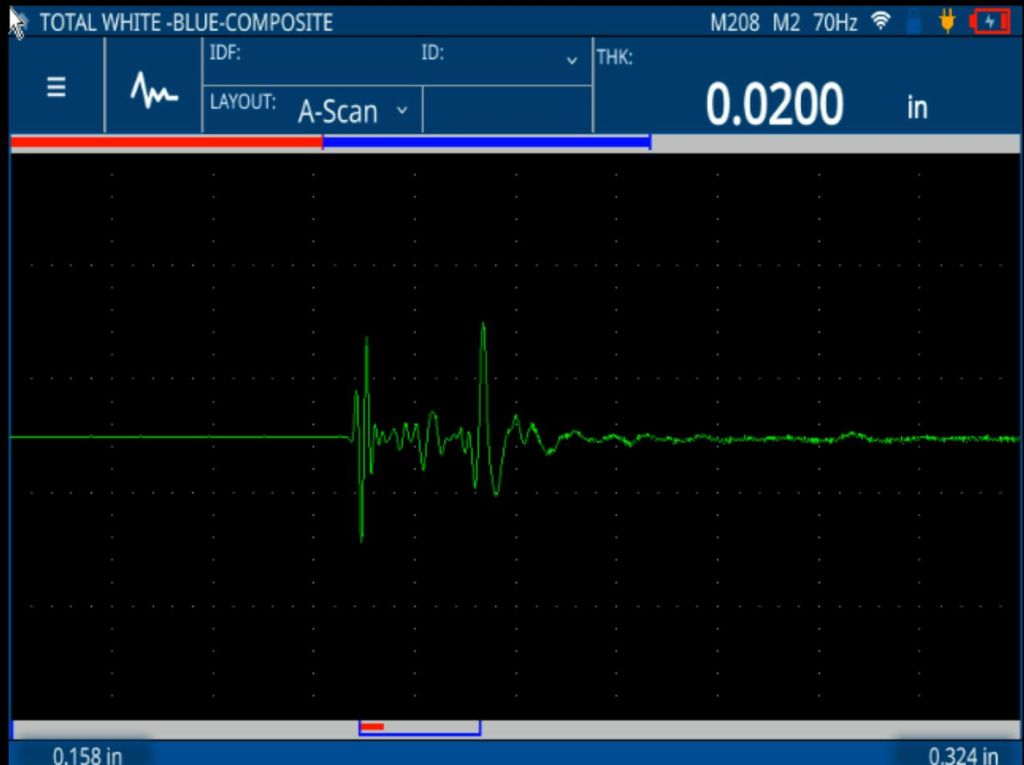
The waveform in figure 2 shows the signal from the aircraft composite sample with the surface layer and two topcoats. The display is optimized to measure the total thickness of the three layers. This measurement was taken on the high-frequency model of the 72DL PLUS gauge paired with an Olympus M2017 (20MHz) transducer.
For the measurement of the individual layer thickness, the 20MHz transducer and ultrasonic setup are optimised to amplify the echoes for each of the three layers of the coating on the composite.
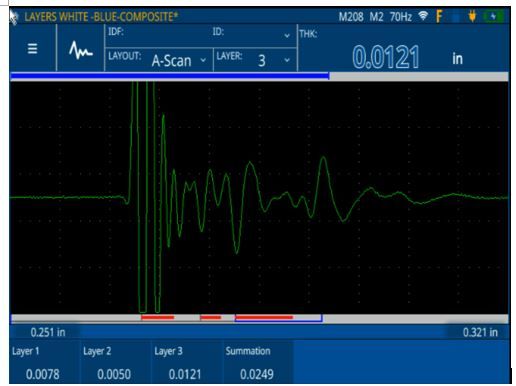
The waveform in figure 3 displays the three individual layers and the total thickness (summation) of all the coating layers on the composite aircraft sample. This measurement was taken on the same 72DL PLUS gauge with an Olympus M2017 (20MHz) transducer.
The results above show how easy it is to obtain single and multilayer coating thickness on composite aircraft with advanced ultrasonic equipment. An intuitive interface and robust data management tools can further simplify the workflow.
For instance, inspectors can save application setups for routine thickness measurements directly from the touch screen of the 72DL PLUS gauge. This reduces manual selection and setting adjustments before each coating inspection.
Using the dedicated PC software, these setups can then be sent to multiple gauges on the production floor or across facilities, enabling aerospace manufacturers to standardise workflows and improve efficiency.
Consider a free digital subscription
If you find this article informative, consider subscribing digitally to Aerospace Manufacturing for free. Keep up to date with the latest industry news in your inbox as well as being the first to receive our magazine in digital form.


